Journey
Topic: Be a Scientist
Energy
1

Watch the Story
All the World by Liz Garton Scanlon
Read the Book
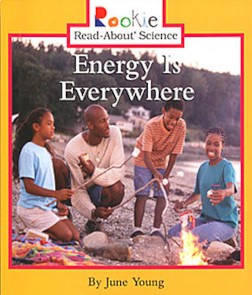
Energy Is Everywhere by June Young
2
All About Energy
Learn about the different kinds of energy we use to power our world.Lesson Activities
Energy
What is energy?
What brings electricity to buildings all across the country?
_______ can run out someday.
Which one is a kind of renewable energy?
Which one is NOT a kind of renewable energy?
{{currentQuestionNumber}} of {{totalQuestions}}

Great Job!
You got all the answers.
3

Science Activity
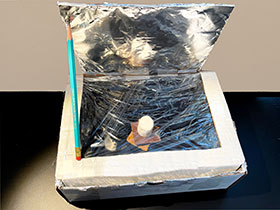
Solar Oven Experiment
Materials: shoebox, pencil, aluminum foil, glue, scissors or knife, clear plastic wrap, clear tape, black construction paper, ruler, food items (options: bread; tortilla chips and cheese; graham crackers, chocolate, and marshmallows)
Materials: shoebox, pencil, aluminum foil, glue, scissors or knife, clear plastic wrap, clear tape, black construction paper, ruler, food items (options: bread; tortilla chips and cheese; graham crackers, chocolate, and marshmallows)
Harness the power of the sun—and cook a yummy treat!
Start by setting up your “solar oven.”
Draw a rectangle on the lid of the shoebox, leaving a one-inch border between the rectangle and the edges of the box. Cut along the two short sides and one of the long sides of the rectangle to make a flap.
Glue aluminum foil to the inside of the flap. Make sure the shiny side of the foil is facing out and is as smooth as possible.
Line the inside of the box with aluminum foil. Then glue black construction paper to the center.
Cover the opening under the flap by taping two layers of plastic wrap across the lid. One layer should be on top of the lid and the other should be on the bottom of the lid.
Put the lid back on the shoebox, and then prop the flap open using a pencil.
Do the experiment on a hot, sunny day. (Ideally the temperature should be above 85 degrees Fahrenheit.) Put the “oven” in direct sunlight. Let it sit out for at least a half hour to warm up. Then put your food items in the box and replace the lid. You could use bread to make toast, tortilla chips and cheese to make nachos, or graham crackers, chocolate, and marshmallows to make s’mores! Leave the food in the box for a few hours to cook.
While the food is cooking, talk to your child about how the solar oven works. The foil captures the sunlight and reflects it onto the black paper, which absorbs the heat. The plastic wrap traps the heat in the box, so the food warms!
Actividad de ciencia
El experimento del horno solar
Materiales: una caja de zapatos, lápiz, papel de aluminio, pegamento, tijeras o cuchillo, envoltura de plástico transparente, cinta adhesiva transparente, papel de manualidades negro, regla, comida (opciones: pan, totopos y queso, galletas, chocolate y malvaviscos)
Materiales: una caja de zapatos, lápiz, papel de aluminio, pegamento, tijeras o cuchillo, envoltura de plástico transparente, cinta adhesiva transparente, papel de manualidades negro, regla, comida (opciones: pan, totopos y queso, galletas, chocolate y malvaviscos)
Aprovecha la energía del sol... ¡y cocina una rica merienda!
Comienza por preparar tu “horno solar”:
Dibuja un rectángulo en la tapa de la caja de zapatos dejando un espacio de una pulgada entre el rectángulo y el borde de la caja. Recorta los dos lados cortos y uno de los lados largos del rectángulo para hacer una solapa.
Pega el papel de aluminio en la parte interior de la solapa. Asegúrate de que la parte más brillante del papel de aluminio quede mirando hacia fuera y esté lo más liso posible.
Forra el interior de la caja con papel de aluminio. Entonces, pega papel de manualidades negro en el centro.
Pega con cinta adhesiva dos capas de envoltura de plástico transparente a lo largo de la tapa para cubrir la abertura bajo la solapa. Una capa debería ir en la parte de arriba la tapa y otra debería ir debajo de la tapa.
Coloca la tapa de nuevo en la caja de zapatos y pon un lápiz para dejar abierta la solapa.
Hagan el experimento en un día caluroso y soleado. (Idealmente la temperatura debería estar sobre los 85 grados Fahrenheit). Coloca el “horno” directamente bajo el sol. Deja que se caliente bajo el sol por al menos media hora. Entonces pon comida en la caja y cambia la tapa. Podrías poner pan para hacer tostadas, totopos y queso para hacer nachos, o galletas, chocolate y malvaviscos para hacer s’mores. Deja la comida en la caja por varias horas para que se cocine.
Mientras la comida se cocina, habla con tu niño sobre cómo funciona el horno solar. El papel de aluminio captura la luz solar y la refleja en el papel negro, que absorbe el calor. La envoltura de plástico atrapa el calor en la caja, ¡para que se caliente la comida!