Journey
Topic: Animals
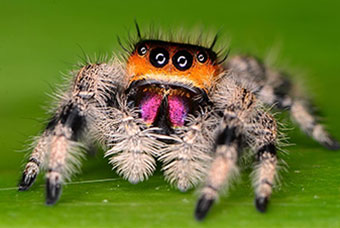
Nocturnal Animals
1

Watch the Story
Owl Moon by Jane Yolen
Read the Book
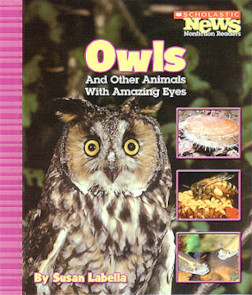
Owls and Other Animals with Amazing Eyes by Susan Labella
2
Creatures of the Night
Find out why some animals sleep all day and stay up all night.Lesson Activities
Nocturnal Animals
Nocturnal animals __________.
Some animals are nocturnal because _________.
What is one way that nocturnal animals are safer at night?
_______ eyes help some nocturnal animals see well in the dark.
Echolocation helps bats know __________.
{{currentQuestionNumber}} of {{totalQuestions}}
Great Job!
You got all the answers.
3
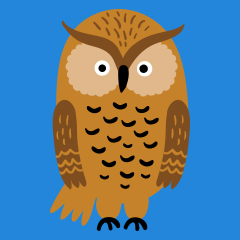

Craft
Torn Paper Owl
Materials: scissors, glue stick, pencil, white crayon or white oil pastel, and for the owl:
blue construction paper for the background
pieces of brown, gray, white, and black paper for the owl’s body
pieces of green, yellow, and orange paper for the eyes and beak
Materials: scissors, glue stick, pencil, white crayon or white oil pastel, and for the owl:
blue construction paper for the background
pieces of brown, gray, white, and black paper for the owl’s body
pieces of green, yellow, and orange paper for the eyes and beak
blue construction paper for the background
pieces of brown, gray, white, and black paper for the owl’s body
pieces of green, yellow, and orange paper for the eyes and beak
Now that your child has had a hoot learning about owls, it’s time to make their own! They will enjoy tearing paper “feathers” and cutting out big eyes for this craft. It builds fine motor skills and helps reinforce the parts of an owl’s body.
First, use the pencil to draw the outline of an owl on the blue construction paper. The owl can either be flying, with wings spread, or sitting, with wings at its side. If you like, look up some pictures of owls for inspiration. Draw in the ears, eyes, beak, body, and wings.
Use the white crayon or oil pastel to draw a moon and stars behind the owl.
Your child can tear the brown, gray, white, and/or black paper into strips, and then into squares. These will be the owl’s feathers. Tear a lot of them!
Cover the owl’s face with glue. Start gluing on feathers.
Give your child the scissors and the green, yellow, and orange construction paper. They can cut big circles for the owl’s eyes. (Remind them that owls need big eyes to see in the dark.) Glue on the big circles. Cut smaller circles for the inside of the owl’s eyes and glue those. Then cut and glue the beak.
Finally, fill in the owl’s body and wings with feathers. It’s fun to use different colors and combinations for the wings and body.
Actividad de manualidades
El búho de tiras de papel
Materiales: tijeras, barra de pegamento, lápiz, crayón blanco o cera pastel blanca y, para el búho:
papel de manualidades azul para el fondo
trozos de papel marrón, gris, blanco y negro para el cuerpo del búho
trozos de papel anaranjado, amarillo y verde para los ojos y el pico
Materiales: tijeras, barra de pegamento, lápiz, crayón blanco o cera pastel blanca y, para el búho:
papel de manualidades azul para el fondo
trozos de papel marrón, gris, blanco y negro para el cuerpo del búho
trozos de papel anaranjado, amarillo y verde para los ojos y el pico
papel de manualidades azul para el fondo
trozos de papel marrón, gris, blanco y negro para el cuerpo del búho
trozos de papel anaranjado, amarillo y verde para los ojos y el pico
Ahora que tu niño o niña se lo ha pasado de los lindo aprendiendo sobre los búho, ¡es hora de hacer el suyo propio! Le va a gustar arrancar “plumas” de papel y recortar ojos grandes para esta manualidad. Sirve para desarrollar las destrezas motrices finas y repasar las partes del búho.
Primero, dibuja con un lápiz el contorno de un búho sobre papel de manualidades azul. El búho puede tener las alas extendidas, como si volara, o a cada lado, como si estuviera posado. Si quieres, busca algunas imágenes de búhos para que te inspires. Dibuja las orejas, los ojos, el pico, el cuerpo y las alas.
Dibuja una luna y estrellas detrás del búho con un crayón blanco o cera pastel.
Tu niño puede hacer tiras con el papel marrón, gris, blanco o negro y luego puede hacer cuadrados con ellas. Estas serán las plumas del búho. ¡Hagan muchas!
Llenen la cara del búho con pegamento. Comiencen a pegar las plumas.
Dale a tu niño unas tijeras y los papeles de manualidades verde, amarillo y anaranjado. Puede recortar círculos grandes para hacer los ojos del búho. (Recuérdale que los búhos tienen ojos grandes para ver en la oscuridad). Peguen los círculos grandes. Recorten círculos más pequeños para el interior de los ojos del búho y péguenlos. Luego, recorten y peguen el pico.
Por último, llenen el cuerpo y las alas del búho con plumas. Es divertido utilizar diferentes combinaciones de colores en las alas y el cuerpo.